Saturday, November 24, 2018

Soft Clear Wax Recipe for Chalk Paint & Furniture- 2 Ingredients $3 TO MAKE!

Soft Clear Wax Recipe for Chalk Paint & Furniture- 2 Ingredients $3 TO MAKE!

Hii I'm Wendi with Nashville Restoration
and today we're going to make some clear wax to use with chalk paint.  You need 1/4
of cup of white beeswax pellets and you need a cup of either baby oil or mineral
oil.  You also need a mason jar with a lid. So just to put your
beeswax and baby oil in your mason jar.

It's got to be a mason jar because other
jars you cannot put in boiling water so make sure it's a mason jar.  Put it on the
stove and fill the water so it's just a half inch below the level of the wax or
else your jar will float up put the top. Put your stove on a medium high heat and stand by. You are going to stir it every couple minutes.

Just to get it mixed up and it
is done when the wax pellets disappear and it looks like this. It is  pretty much
clear when it's done. You can let it cool in the pan but if
you want to do it more quickly which I. Usually do, just carefully remove it from
the pan.

It is hot oil and it's very dangerous so do it with a great deal of
caution and use some pot holders. Now you are ready to cool it. Put some ice water in a pan and once again add water just below the level of the oil. You're just going to stir this every few minutes until it starts to turn
cloudy like a cloudy white.

When it looks like this, after about ten minutes of stirring every couple of minutes, take it out of the ice water and put the
lid on and shake it up. You're gonna come back and shake it up for thirty seconds every five minutes or so until it has reached room temperature.
Once it's room temperature it will stay like this it will look like this and
that is your clear wax. This looks pretty much exactly like the clear wax that I
have purchased from some name-brand companies and I can't tell the
difference when I use it. It brushes right on just like the other
waxes do that are commercially prepared.

I came up with this recipe doing
some research trying to figure out what was in clear wax and these were the two
most common ingredients so I skipped any additives and just went with these two ingredients and the shaking it up is really important. That's what keeps it blended.
If you don't shake it up it's gonna you kind of separate. I wanted to show you what it looks like on furniture. So this is just a basic white table.

I'm
gonna brush it on just like any other clear wax. I don't use a wax brush I use
this type of brush. It is  a $6 brush and I can't tell the difference in the
brushes.  I mean after you brush it on  and you're still going to come back and
wipe it down and then if you're distressing you're gonna sand so to me
if you like the brush you're using and the wax goes on then that's the brush
you should use.

So as you do with any wax, you wipe the wax down after you put it
on there. If you're distressing this is when you would distress when the wax is
still fresh on there. It's a lot easier to distress then waiting for the wax to
actually dry and set up. So I did some of this distressing off-camera because I'm going to break out the electric sander because hand sanding the top is pretty
intense.

So this is what it looks like afterwards. This is my clear wax results. I'm
completely happy with it. I've been painting for many years both houses and
furniture and I think this works great.

So thank you for watching. Please check
back for more videos don't forget to subscribe and if you have a video you
would like to see, send me a message. I also put up videos all the time so
please check back for new stuff. Thank you!  .

Friday, November 16, 2018

Silver Metallic Furniture Painting DIY Princess Chair Makeover!

Silver Metallic Furniture Painting DIY Princess Chair Makeover!

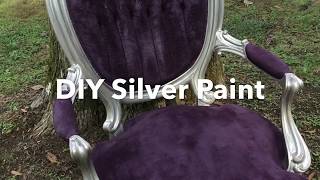
DIY Silver Paint Victorian Chair Makeover For this project you will need some
oil-based silver paint. I am using "Liquid Leaf" and it is available at craft and
hobby stores and you can also order it online. I'm using oil-based paint so that
I don't have to strip and sand before I. Paint the chair.

I'm using a one-inch
artist brush and you can either be ready to throw your brush away or get some
mineral spirits to clean your brush with when you're done. Make sure you shake up your paint really well before you start. I'm taping the edges of the fabric with
painters tape because you will not get the paint cleaned off the fabric if you
get it on there so tape it as close up to the edges as you can. I cover the
rest of the chair with fabric kind of as I go to keep drips from getting onto the
fabric.

This paint goes on very easily and it also dries very fast. I paint in
the direction of the grain only because that gives it a more natural look. I also
use for this entire chair only two of the small containers  of paint that I showed in the beginning of the video When you get close to the edges where the fabric is,
just go really slow and try to not even get any paint on the tape and if you do
that, you're less likely to have the paint seep under the tape. Just get your paint on enough to cover
and be sure you don't leave any drips behind.

One of the hardest places to keep
paint off the fabric is down where the arms or the back of the chair meet the
fabric so be especially careful taping that off that you are all the way up to
the edge between the wood and the fabric. I usually add a couple extra rows
of tape because if I don't I will probably either drip paint on the fabric
or rub my brush against the fabric as I. Go. To paint the chair you want to keep a
minimal amount of paint on your brush when you do this.

You want to stay
away from the tape as much as possible. Just try to use a little bit of paint and
do a light coat and don't try to jam your brush down next to the tape because
it will probably seep through onto the fabric.   The reason I'm using the oil-based paint
is so that I don't have to sand this wood all the way down or prime it before
I put this paint on there. The only reason my wood looks like this
is because I tried a different metallic paint that I did not like so I had to
remove most of that chalky finish to put this finish on there.

The other reason I like
an oil-based paint for this chair is that when I go to distress it I can go
ahead and distress it and I do not have to put a coating over top of it like a
clear wax or polyurethane. Once it's distressed it's ready to go. You could
also just leave it silver if you didn't want to distress it. So this is a pretty
quick and easy way to do this chair.

I let my paint dry for eight hours before
I came back to distress it. The best sandpaper to use when distressing this
is going to be between 180 to a 220 grit. It will take the finish off fairly
easy so just go slow so you can see what you're doing and learn exactly what the
sandpaper is going to do. Because this is an oil-based paint it actually has
undertones in the silver so what happens is when you sand it is that it looks kind of like sterling silver.

It brings out some grays and some blacks which are  colors from which this paint was made. As much as I like chalk paint I
have found that the best metallic finish is in an oil-based paint and that is why
I am using that on this chair. I tried a metallic chalk paint before this and it
just did not have the kind of shine you can get from an oil-based paint. Now like
I said I am NOT going to put a top coat on this, If you wanted to you could put
an oil-based polyurethane on it but I.

Don't see a reason to because you've
already got a well protected shiny finish and you just don't have
do that.   I'm doing most of my sanding just on the
edges and then I kind of run the sandpaper down the middle of the grooves as I go, -it's pretty quick and painless to get this chair distressed with this
paint so probably about 10 to 15 minutes of sanding on this chair and it is done.
I always sand with the grain because it gives it a more natural look and then
like on the bottom of this leg, I go around the other way because that's just
how it would be naturally. So these are my results. This is my sterling silver distressed Victorian chair makeover.

I'm really happy with it I think it looks
great. I love the paint and I love the colors. So thank you for watching please
check back I put up new videos all the time and I have all types of DIY videos for furniture, dressers, upholstery and
some DIY home repair stuff. Thanks for watching! You.

Thursday, November 8, 2018

Second-Hand FurnitureBudget Home Tour

Second-Hand FurnitureBudget Home Tour

Hello guys, my name is Tegan and today I
want to show you our secondhand furniture, which is basically all of our
furniture. There are several reasons why my husband like to further by secondhand
furniture rather than brand new. Number one you save money. Secondhand is always cheaper than brand new.
Number two, you can buy more unique pieces.

Not necessarily one-of-a-kind
antiques but furniture that says something about you rather than when you shop.
Number three you can afford higher quality, solid rather than ply-board
pieces. This third point is what we really try to focus more on nowadays. So,
quality over quantity in all aspects of life I guess.
And number four, you reduce
landfill by buying less into consumer culture.
Our shoe cabinet is actually a
wine cabinet.

I saw this idea on pinterest and I bloody loved it! I grew
up never wearing shoes inside the house so there must always be somewhere to
store shoes at the door. You can find wine cabinets much cheaper than this but
I took a long time to find something that would fit in this awkward space for
our front entrance and now that is one of my favorite pieces of furniture.
It's very solid and I think it's probably the highest quality piece we own. We brought it home hanging out the boot of a car! I thought i was going
to lose it on the freeway but you gotta do what you gotta do!
This plant stand was
$12 at a trash and treasure market. I had literally been looking for one like it
for years but athefew I'd come across were always more than $100.

When
I bought it and was carrying it around the market, one lady accosted me and
seemed to be very upset that I'd found at first. She was like, "where did you get
that?!" "What are you gonna do with it?!"
And I was like,
"I'm gonna put a plant in it?" I swear she nearly ripped it out of my
hands This entertainment unit was probably a
little more than i originally wanted to pay, but we really love the design. All we
had to do was drill a hole in the back for the DVD player and the appletv
chords. And it's got plenty of room for all our
DVDs, our cds and a few other bits and pieces as well.


We have pretty much decided that we are never ever going to buy a new couch or lounge suite again, so
long as we have our cat Selene. The only piece of furniture we've bought
brand-new was a Fantastic Furniture couch, it wasn't amazing quality but it
looked alright and it did the job. Then Selene arrived on the scene and she
thought it belonged to her. I tried everything to stop her scratching it;
wrapping it up in tin foil and sticky tape, buying her all the different kinds cat
scratchers but she basically destroyed it within 18 months.

We purchased this
leather suite for a great price and around the same time I invested in the
cheapest cardboard cat scratchers from Kmart which Selene loves! We don't expect it to stay in pristine condition forever because Selene does still like to sleep
on them but at only $250, we don't really mind so much
This rug, while not secondhand,
was ex-floor stock which is another great thing to look for
instead of buying brand new. Before I met Adi, I planned to keep a Jungle Python as a pet. I arranged for my wildlife keeper license and I bought
this converted kitchen cabinet from eBay as a terrarium. Then almost immediately
after that I met Adi and he flipped out when he saw the, what i thought was an
obviously fake snake, so it's been empty ever since.

I don't really want to get
rid of it. We use it for book storage and I keep my
records in here as well. We've thought about keeping frogs or stick-insects in
here but I'm not so keen. I'm not sure really how I feel about keeping a snake
in such a captive environment anymore either.

This is the second dining table we've
bought a couple. When we first moved in together we used my old IKEA desk as a dining table for months.
Then we bought
a small round 4 seater on ebay and once we moved into this house we sold
that one to someone who was going to refurbish it, because we want to tell me
bigger for this space honestly I think we paid a little too
much for it, especially since it's just from Fantastic Furniture but it has been
serving us very well. I searched for ebay for our master bed suite for
months and eventually won the bidding on this one for what I think was a great
price.

It's natural, solid oak and I love the paneling on the side of the drawers.
The model came with wooden handles for all the drawers but the previous owners
never installed them and we think it looks great without them too!
We were a bit disappointed with this purchase, it's a fantastic furniture brand again
and while I knew this when we bought it the photos did not indicate the poor
condition of the wood and I couldn't leave it there because I'd already
organized for my father to bring his ute up to the city to help us collect it. It has however been very useful when
family come to stay. And finally, not really a furniture item i guess but a
large household piece nonetheless Our aquarium which is way too expensive for us to buy brand new. This was another 'hanging out the boot on the freeway'
scenario which in hindsight was not the smartest idea.

But it survived and even
though we've only had varying success with the aqua garden and not very much
success with fish, I think it's a great addition to our
home. Not just with the peaceful vibe it creates but the cupboards below act as
bonus extra storage too. Thanks for watching guys, let me know if you enjoyed
this video and whether or not you buy secondhand furniture and, if so, what is
your favorite piece?
See you next time Bye!.

Thursday, November 1, 2018

Packing Tips for Moving Furniture

Packing Tips for Moving Furniture

When planning for furniture, don't forget to
think about the pictures and the mirrors and the other wall decorations. The
easiest way to pack them up is just to get a picture bag. It's basically a large
foam bag and you can just unfold it and slide it right over the pictures and
mirrors and it will protect them in the back of the truck. Another piece of
furniture that sometimes difficult to pack and protect is going to be things
like the sofa or loveseat.

So the best way to do it is to use a sofa table
protector. It works for upholstered sofas, but it'll also work for larger tables
like a dining room table, kitchen table or the dresser that would be in your
bedroom. The sofa table protector is a three layer product. There's a tough poly
on the outside, there's a standard plastic layer on the inside and in
between is a non-woven fabric layer.

What that does is that allows the inner and
outer surfaces to slip against each other without transferring any abrasion
onto the fabric or onto the leather. Moving blankets are another great tool
for packing furniture. They work very well with both upholstered and wooden
furniture so anything like sofas, chairs tables, nightstands, dressers really any
of the furniture around your house is going to be a great thing to protect
with. The premium moving blanket has a navy blue outside that's a woven layer.
It's tough, it's durable, it's gonna take abrasion when you pack it in the back of
the truck.

The inside is a black non-woven layer and that's a soft non-abrasive
surface. Make sure you put that side to the furniture and the navy blue side to
the outside. The easiest way to use moving blankets is just to simply drape
it over the chair or table or whatever furniture you're protecting and secure
it using 20-inch or five inch stretch film.    .