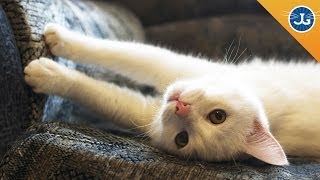
All right. Fine, Jackson, fine. You told me all about
declawing and how terrible it. Is And fine, fine, I
won't declaw my cat.
My cat is still
wrecking my house. My cat is scratching
up my furniture. My cat is scratching me. I don't want my cat to scratch.
Now what do I do? Well, calm down Sleepless
in Scratchville. It's time to get catified. If you watched episode
about declawing, you know exactly where
I fall on the matter. I mean, I made myself
pretty clear, right? Don't do it.
Don't do it. It's inhumane, it's cruel,
it's unusual, it's unnecessary. And it rarely works in
solving behavioral problems. It usually makes
other ones crop up.
And did I tell you it hurts? You said, find. And you said it in
loud, loud ways. I mean, thank you
by the way, people. The way you're coming out,
team Cat Mojo in force, right? How do you live with
a cat and her claws? Well, I'm going to tell you it.
There's a few things we
have to bear in mind. Scratching is a
necessity for cats. It's not a luxury. Cats need to, first
of all, exercise the top part of their body.
It's a nice way to grab
something and pull down and get that exercise. Also, it's a really important
part of marking territory. Now remember, Cat Mojo 101. Cats need to own places.
If they don't own places, they
become very, very insecure and anxious, and they
act out in other ways. If it is a necessary, if cats
do need to scratch, well then, what are we going
to do about that? The first thing that we
do is trim their nails. You take either a nail trimmer
or a human nail clipper, or the ones that they
sell in the stores that are more like systems,
whatever suits your fancy. You press the cat's pad.
And boink, out comes the nail. All you've got to do
is take off the tip. You don't have to
take off that part where the red meets the white. You don't have to worry
about hurting them that way.
You don't worry
about what we call quicking them, which is
hitting that blood supply and making everyone unhappy. Just bump, and it's done. It's also the approach, folks. Just act as if you're just
walking up and you're say hi.
And things will get
much, much easier. Also, catch them napping. I mean, when your cat's
sleeping or just waking up, you're having a lazy
moment together. You can have clippers
by the side of your bed.
All you're doing is getting
the nail out and clipping. If every time you
touch your cat's paws, they're going to get clipped? Then they're not going
to let you do it. So associate it with positive
things, a nice quiet time. And then maybe you
only get one nail while you're sitting there.
That's fine. Because over the course
of a couple days, you'll get them all. The next thing that we want
to start thinking about is where they're scratching. Remember, it's
territorially important.
There's two human scent
soakers-- your couch and your bed. Where do you spend the
most part of your time when you get home from work? Your couch and your bed. And that's where
your scent is strong. It's a scent soaker.
And because of that,
your cat is going to want to compliment
your scent with theirs. In the show, you've seen this,
I'm sure, a million times. I get redundant. The yes and the no.
Behind every no,
there has to be a yes. If we don't want them scratching
on the arm of the chair, we have to say, well, this
location is still important. Let's say you use a
product like Sticky Paws. Sticky Paws is
double-sided sticky tape that is actually designed not
to actually stick to your couch.
But when your cat touches
it, it's kind of tacky and they don't like it. OK, we'll say no, and put sticky
paws down the arm of the couch. But right next door, there
has to be a scratching post. There has to be a scratching
post that works for them so that they can compliment
your scent with them, and leave a visual and scent
marker in a territorially crucial area.
What makes a good
scratching post? All right, let's
talk about that. The first thing is
a nice wide base, because if your cat goes to
scratch down and the thing wobbles, well then,
the couch wins. Does your cat prefer corrugated
cardboard or sisal rope or carpeting or natural wood? What is it your cat likes? There are a lot
of nice scratches out on the market there. But you've got to sometimes look
in different places, you know? You don't want to just go
for the first one you see, and then get mad
when it doesn't work.
In a situation where
you have young children, or if you're immune
compromised, things like that-- which in the past
were kind of given reasons to declaw a cat-- you can think
of something like Soft Paws. And Soft Paws is a brand
name, but there are other ones out there. They're basically
just vinyl nail tips. They go on.
They don't hurt,
nothing like that. And the only downside is
that after a month or so, they're just going to pop
off as the nail grows. And then you trim the
nails and do it again. It is a way that there's
no way that the nails can do any damage.
I like that to be
sort of a last resort. Because why do it? Why go through all
the aggravation if you don't have to? Plus. I like accommodating
the raw cat. We want cats to be confident
in the areas that they scratch.
We want them to assert
themselves territorially. We just want them to
do it in the place that we want them to do
it, and not in the place we don't want them to do it. Don't forget, you can start
this when they're young. I mean seriously, if you are
clipping your cat's claws and giving them the yes and the
no, and they're a young kid, you will not have a
problem as they grow up.
And there's a lot
of people out there who are like, why would
I compromise for my cat? You know, you've got children. You've got spouses and partners. And let me tell you
something, the compromise involved with those guys
dwarfs the needs of your cat. So listen, if you've got
to go out there and get a scratching post, you've
got to put some sticky tape on your couch, you've got
to go put Soft Paws on, you've got to clip
your cat's nails.
That's the cost of having
a beautiful relationship with your cat. It is an invaluable
relationship, and beautiful in
every single way. Now you know everything
that you need to know-- the basics,
anyway-- on making sure that your furniture and
the people in your house stay safe while keeping
your cat's claws intact. Now, in the meantime folks, you
can find me anywhere, right? Anywhere and everywhere.
Find me Twitter, Facebook,
InstaGram, Google+. There's no excuse. I am all over the place. Be sure to join me on
Wednesday, February 5.
I'll answer your questions. And we're going to talk
more about declawing. So stay tuned for
more information. But man, get that on your
calendar and do it now.
Hey, I've got to say
it one more time. Folks, thank you so
much for the support that you're showing that last
video that I put out there. It's getting circulated
far and wide. You are telling your friends.
We are finally going to
get that message out. What's the message? Declawing your cat is not OK. Anyhow folks, until
we talk next time. All light, all love,
all mojo to you.
Muah. [MUSIC PLAYING].
 Now I'm about to demonstrate how to strip
 Next I will be demonstrating how to bend wood.
 Want to speak real Hebrew from your first lesson? Sign up for your free lifetime account at HebrewPod101.Com. Hi, everyone! My name is Yaara and this is Hebrew Weekly Words. Im really glad you joined us because the theme this week I think is really useful and its Furniture. So lets start!
  - [Arthur] I hate plastic. That's why we've engulfed
 Hii I'm Wendi with Nashville Restoration
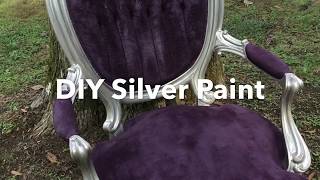 DIY Silver Paint Victorian Chair Makeover For this project you will need some
 Hello guys, my name is Tegan and today I
 When planning for furniture, don't forget to
 Hey everyone, Lesley Myrick here - with a
 Welcome to Lusso-Woiss furniture store! We offer various kind of high quality stylish home furniture in avantgarde, ulta-modern and romantic-avantgarde styles. Romantic avant-garde furniture is characterized with plenty of decoration elements and romantic patterns everywhere on the sofas and armchairs, on the beds and bedside tables, on the wardrobes and dressers, on tables, chairs and sideboards. Our showroom is located in Istanbul, in furniture city Masko. This is our main national showroom and store, which daily visits a huge number of foreign customers who came to Turkey specifically to purchase furniture or be inspired.
 My name is Olympia, um I'm 17 I'm just a
 Hi everyone it's Rosanne here from Country Chic Paint. In this video I would like to tell you about our fabulous Hemp Oil It is a 100% natural finishing product so it's a great choice if you're looking for an environmentally conscious, easy-to-use furniture finish Stay tuned for more details As I mentioned, our hemp oil furniture finish is a one hundred percent natural product with no chemical additives. It is completely environmentally friendly and safe to use. Our hemp oil is sustainably sourced from Canadian farmers Hemp oil is a drying oil This means that it polymerizes and hardens into a protective coating for your furniture.
 I'm going to show you how to restore wooden
 Hi I'm Adam and today I'm going to show you
 Okay, let's get this project started. Notice
 Okay now we're ready to put in the patch that
 Furniture Repairs Made Easy This is our entryway bench and antique ride and today what I want to do I want to show how to how to repair some of these damages. We need a rough patch, a soft patch and the plastic card, the hard one and a wax stick and a touch up pen and and pretty much all these items available locally at your grocery store or
 Aright, this is it, the final thing, part
 Hey in this video, I'm going to teach you
 If you don't have time or live too far
 Hi there it's Rosanne here from Country
 Hey there and welcome back to this
 It's getting thick Its growing in thick Its looking sweet, aint it I cant think of nothing to say, NOTHING. Shootz brah Im acting like CeLo with my animal during an interview Hey buddy So whats up guys, I just wanted to give you a quick little tutorial on layering stain. Kind of like i did on the top of that wave desk, on the outside, where I had a couple different colors, sanded it just a little bit, and then layered it. It gave it a kind of cool look.
 Hello this is Jose with Bedbugsupply.Com.
 Hi there, it's Rosanne here from Country Chic Paint. Today
 Hi there, it's Rosanne here from Country Chic Paint. You may have seen some fantastic project done with our metallic creams but